

Language:
Español
Index
Forms
Strongback
Stripping
Epoxy
Coaming
Hatches
Closing
Related info
Questions
Bibliography
Peperina team
Other kayakers
Link page

|
Behind the cockpit, and before applying the cloth to the entire deck,
I added an extra patch of fiberglass (a remnant of 220 gr/m2). This
section may receive some extra loads with wet entries etc.
|
|
|
|

|
|
|
Impregnating the cloth, which nicely fused with the filler putty,
and with the tape added previously.
|
||
|
|
|
|
Here's when the complete deck has been 'clothed'. I used several
large leftovers, overlapping them near the cockpit. At the top left,
a patch of cloth that needed a bit of pressure.
|
||
|
|

|
|
|
The cockpit area. The union of the 4 pieces of fiberglass is nearly
invisible, except in the actual cockpit opening.
|
||

|
|
|
|
Now it's the hull's turn. With a sandpaper disk in the drill, I
managed to remove most of the the glue and epoxy drops, and obtain
a reasonable surface quality. The dark spots are last minute
touchups.
|
||
|
|

|
|
|
Time to dress the hull inside. I'll add a second layer near the cockpit
area later.
|
||

|
|
|
|
The wife, Sabine, helping out with the resin.
|
||
|
|

|
|
|
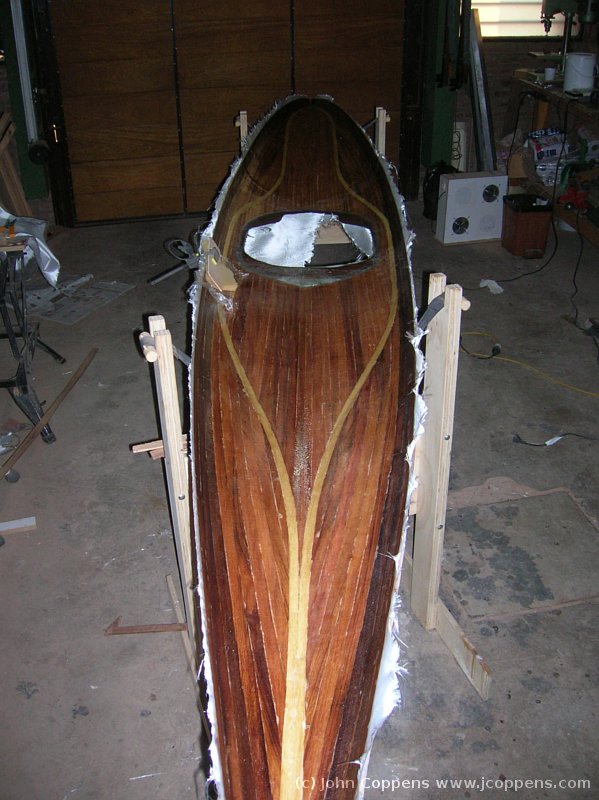
Ready. The upper part reflects the light coming in from the garage
door. For the first time after weeks of cold, we suddenly had
temperatures well over 30 C this weekend.
|
||
Sigue con la parte superior de la brazola.
| (c) John Coppens ON6JC/LW3HAZ |