

Language:
Español
More info:
FAQ
Bibliography
Peperina team
Other kayaks
Links
Kayakers
Products

|
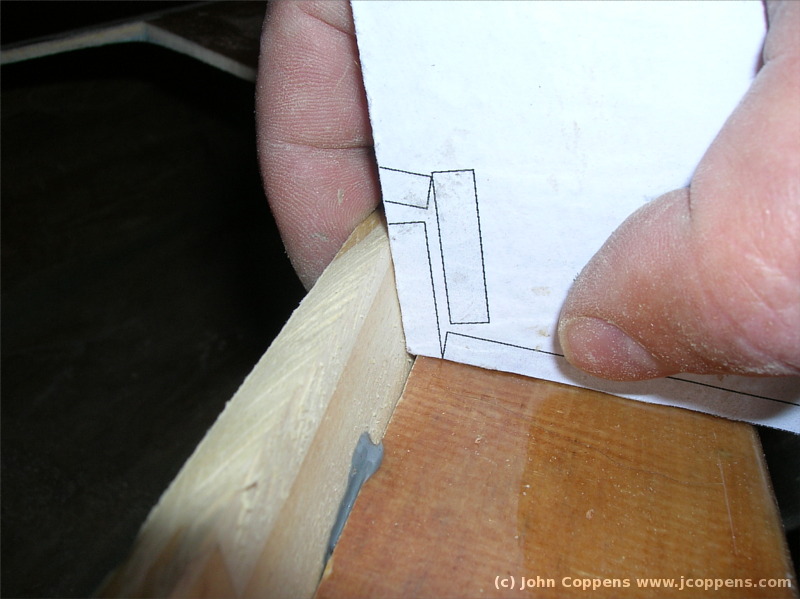
The construction of the frame becomes a routine: First cut one of
the wooden slats approximately to size - a little too large. Finish
one side with the correct angle... (half the angle of the corresponding
vertex).
|
|
|
|

|
|
|
... then correct the length till it fits correctly, and terminate the
correct angle at the other end, taking into account the inclination
of the strip itself, and the ones it will be glued against (the
templates mentioned earlier are useful here !)
|
||

|
|
|
|
For an initial fix, I used a small amount of two-component 10' epoxy
glue near each end of the strip. I used the gray version of the
glue, as I've experienced that the transparent variety quickly
deteriorates with UV radiation. Also, the gray color will blend
with the final putty. A strip of duct tape helps in fixing the
height.
|
||
|
|
|
|
|
I didn't find a way to fix the position of the strips while
waiting for the glue to harden, so I waited a couple of minutes
each time. Again, the template is useful here! Luckily (for me),
the day I choose to make the hatches, temperature was near 40C,
and the glue hardening was very fast!
|
||

|
|
|
|
One of the corners that came out worst (the first one I did). I'll
have to fill out the separation later.
|
||
|
|

|
|
|
The forward hatch frame ready! (The hatch cover is also ready,
but I'll describe its construction later)
|
||

|
|
|
|
With the actual hatch cover in place
|
||
|
|

|
|
|
The finished aft hatch frame.
|
||

|
|
|
|
As a rest from the fitting, I made a 'dish' of deck-eyes. 12 are needed:
6 for each hatch: two for the cover, and 4 for the deck.
|
||
| (c) John Coppens ON6JC/LW3HAZ |