Tutorial: Create a glass - step 1.
Parts: -
Intro -
1 -
2 -
3 -
4 -
5 -
6 -
Conclusion A cosy spot to drink a glass...
The
base scene for this experiment should be copied to an appropiate place on your
hard disk. Once copied, you can load the scene in kpovmodeler
(File -> Open...) or use the corresponding icon.
In order not to destroy this copy, it's recommendable to save the
loaded scene under another name, so we can experiment freely.
Use File -> Save as... to indicate a new name for the scene
(glass.kpm wouldn't be a bad choise, would it?).
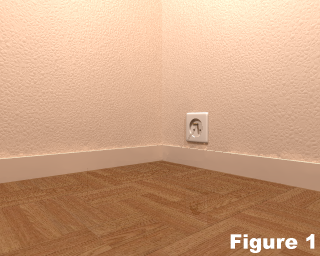
This base scene (Figure 1) presents a default environment, some lights,
and a camera, all indispensable for the renderings we'll be doing
while experimenting. The elements in the scene will make our playing
with refraction indexes, reflections, and caustics, more interesting.
This scene is, in fact, part of an environmente I'm actually
modelling.
Step 2
5698
|
(c) John Coppens ON6JC/LW3HAZ |
mail |